
-->
This tutorial was written in PSP 9 and can be used with any other version.
I assume that you have a working knowledge of PSP.
(I have nothing against blondes or any other hair colors so don’t be offended! You can change the hair color name to whatever hair color your hair is! )
-----------------------
Supplies Needed:
Tube of choice/close up
Awesome Scrap by Tamie
Buy her “Bad Girl” scrap Here Which is
64% off get it while it lasts! it's a must have!
Fonts of choice & Mask of choice
I used Vix_mask365
Plugins Optional:
Eyecandy 4000-gradient glow
Pent.com-color dot
Mura’s meister-copies
-----------------------
I am using the artwork of Keith Garvey
You buy his tubes here www.mypsptubes.com
-----------------------
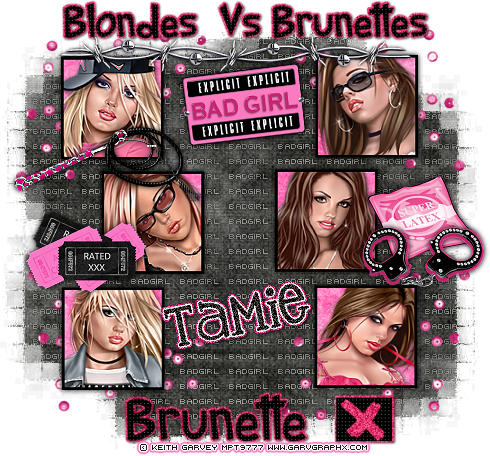
Let’s open a 600x600 canvas you can resize later let’s open all the scrap pieces you want, now grab your preset tool and go to rectangle, and on the top make sure the “square” is checked, (it will make a perfect square then lol) check your “background” layer and go to your patterns and open your paper in through there so when you drag out the square your paper is already in there! now drag out 3 on each side both now straight mix it up and use my tag as an example. now once you’ve got all 6 squares select them and now start adding your tubes, left side I used 3 gorgeous blondes, and on the right I used 3 gorgeous brunettes! Once you’ve added these, which you would select all>float defloat> and copy and paste each tube in invert>delete.
Now add a semi think black gradient glow around all your squares, add drop shadow. Now it’s time for your mask, once you’ve added your mask bring out your text tool type out “badgirl” in a pixel font, let’s go to your plugin copies mess with the settings to get your liking, select your mask selections all> float> defloat> invert now go to your text layer and click delete. Select none.. now make sure your text layer is below your squares but above your mask. Bring out your text tool again type out “Blondes Vs Brunettes” on the top of your tag above your frames, now add “Brunette” or which ever hair you choose to put, now bring out your square preset tool again draw out a small circle, now go to your preset shapes and look through and find a check mark or an X. now with that I added my color dot to the words itself and the square and X, then I added a hot pink glow behind everything then I did a drop shadow to my texts and square.
Now for the fun part! Now add all the hot elements you want all around your tag, in this awesome scrapkit there is elements for everyones tastes, I used the sequins, whip, tickets, condom, handcuffs, barbwire and bad girl plate, now resize your tag if you want, add your copyright, your name and now save as PNG and you’re done!
-->
Thanks for trying my tutorial.
Now lets see those results,
I hope you have enjoyed this tutorial!
-----------------------
This tutorial was written on June 19, 2010 by Melissa.
In no way may this tutorial be copied to another
website without the creators permission. Any resemblance
to this tutorial is purely coincidental.
No comments:
Post a Comment