Showing posts with label No Scraps. Show all posts

Monday, November 14, 2011

The Diva


This tutorial was written in PSP 9 and can be used with any other version.
I assume that you have a working knowledge of PSP.


-----------------------
Supplies Needed:
Tube of choice/close up
Template10 by Lori
find her temp HERE
gradient of choice
Fonts of choice
 
Plugins needed are Optional:
penta.com - color dot
penta.com - jeans
photoeffex - scanlines
xero - radiance
alien skin xenofex - constellation
eye candy 4000 - hsb noise
i just don't have that plugin
anymore so i use add noise
lokas software - plastic
or you can use eye candy 4000 - glass


-----------------------
I am using the artwork of Elias Chatoudis
You buy his tubes here PTE
-----------------------


Let's open her template, i took off the top left and bottom squares, delete them. also took off the white background. now let's open a close up tube of choice, select the black circle then selections all> float> defloat> now copy and paste as new layer of your close up tube place where you want now selections invert>delete select none.


adjust>hue and saturation>colorize make sure the dials are both at zero to turn black & white, now lower opacity down to 30 or to your liking, now we're going to open our plugin xero - radiance apply settings of your choice, now closeout of all your layers aside from the black circle, tube layer merge these now let's open penta.com - jeans, settings of choice, then open alien skin - constellation also settings of choice.


unhide all of our layers, click on middle frame let's open our lokas - plastic settings of choice, but click on the color section next to color overlay (should be black click on it) and select a color of choice i used purple now let's open photoeffex - scanlines now use settings of choice on your frame, now select your colored frame, selections all float>defloat> modify> expand by 2 now add new raster layer, flood fill color of choice, i used white select none now drag your white frame under your middle frame, so there is a thing white on the outside, now add noise then drop shadow close out all layers besides your noise, frame, black circle layer now merge and unhide everything else.


now do the same with your top and bottom trio layer, the same steps as your middle frame when you get done with that close out of all layers but your noise frames for the trio frames and trio frames now merge and unhide rest of the layers.


select your bottom inner circle trio frames, selections all float>defloat add a new raster layer and flood fill gradient of choice select none and do the same with the top trio inner circles, (delete the template circles) i then copy and pasted my two tube faces in the little circles you can use whatever part of the tube you'd like, by selecting your gradient circles selections all float>defloat> paste your tube as new layer invert>delete, do this for each circle, changing the blend mode for each tube layer to either overlay or screen, while adding xero - radiance to each tube setting of choice hide all layers once more then merge your tube layer, gradient circles then add penta.com - color dot settings of choice.


Now let's add your main tube i used the oppisite tube i used inside the big circle, hide behind your trio frames, add drop shadow, xero - radiance to your tube if you'd like... now resize if needed i just merge everything cut and paste as a new image and it makes the tag smaller now add your copryights, your quote if you want any then add your name save as a PNG and now you're done.. i hope i didn't confuse you much if so if you have any questions feel free to leave so in a comment or in my chat box and i'll try to get back to you soon and help you out.


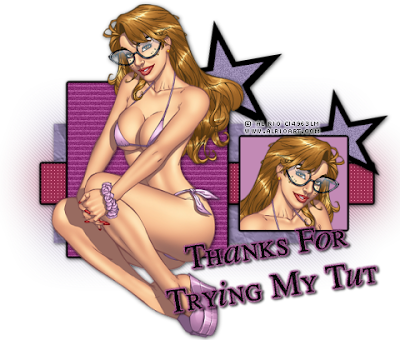
Thanks for trying my tutorial.
Now lets see those results,
I hope you have enjoyed this tutorial!


-----------------------
This tutorial was written on November 14th, 2011 by Melissa.
In no way may this tutorial be copied to another
website without the creators permission. Any resemblance
to this tutorial is purely coincidental.

Sunday, April 11, 2010

Bad Attitude


This tutorial was written in PSP 9 and can be used with any other version.

I assume that you have a working knowledge of PSP.


-----------------------


Supplies Needed:

Tubes of choice

No scraps needed

Missy’s Template 335 HERE

font of choice i used TheNautiGal


Plugins Needed Optional:

MuRa's Meister - Copies

PhotoEffex – Scanlines

Xero – Radiance

Penta.com – color dot


-----------------------

I am using the artwork of Mark Wasyl

You can buy his tubes here CILM

-----------------------


Open up your template


Let’s take off the text “my bad attitude” right click “cut” now paste it back into paintshop, I resized my template to about 80% before continuing to the next steps.. now use your selection tool and draw a rectangle around one of the top words, now cut that off and paste back onto your template, *if too confusing just re type out “my bad attitude” in your gradient of choice* use your “meister’s copies” plugin and settings of choice, I used “tiling” though, the rest I just messed with to suit my needs.. I used it inside the big black circle, so I now select the black circle selections select all>float >defloat, click on your copies text layer, not go to selections>invert deleted, now select none.. I also took off some of the other stuff, like the stars, and the text “I don’t give a toss” this is optional


Now get rid of the layers you aren’t planning to use, so there is less layers to deal with, once you’ve done that Select the light blue circle “circle2” and selections all, float> defloat add a new raster layer and flood will color of choice, or leave this color the way it is, select none, now delete the original circle2 layer


Now get your for your main tube, resize if needed add drop shadow now place in front of the black circle cut off the access, now add drop shadows on the layers you’ve done.

Now select your gradient filled rectangle selections select all>float >defloat paste your tube of choice, select invert> delete now selections none, now use the same tube or use a different tube from the same artist and do the same thing to the other side, now change blend mode to “screen” now lets go to the plugin scanlines use your own settings.


Now lets go to the center rectangle, selections all float>defloat, copy and paste your tube of choice on each side so you can see them in the “squares” now select delete and select none, now select one of your tubes layer and make it black & white, now add your plugin radiance settings of choice, now go add your “my bad attitude” that we cut off the template in the beginning and place on the squares, or make your own text and re-do it yourself, sorry if it’s confusing.


Now go to your 2 gradient filled circles add your plugin penta.com – color dots, now add this effect to the other circle.


add your copyright & your name, Now save as a PNG and you're done!


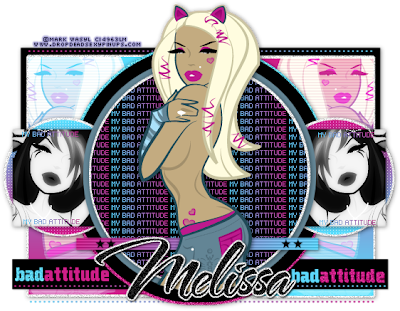
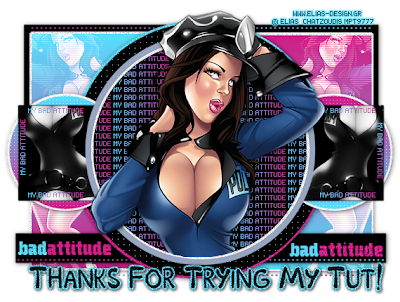
Now lets see those results,

I hope you have enjoyed this tutorial!


-----------------------

This tutorial was written on April 11th, 2010 by Melissa.

In no way may this tutorial be copied to another

website without the creators permission. Any resemblance

to this tutorial is purely coincidental.

Sunday, January 24, 2010

Blue Dreams


This tutorial was written in PSP 9 and can be used with any other version.
I assume that you have a working knowledge of PSP.

-----------------------

Supplies Needed:

4 tubes of choice
Template 77 by Melissa'z Creationz
She has great templates HERE
Glitter style of choice
Mask - WSL_Mask218 HERE
Font of choice i used - sketchy


Plugins Needed Optional:
Eye Candy 4000 - gradient glow
Xero - Radiance
Xero - Fritillary

Penta.com - color dot


PSP Effects
Texture Effect - Mosiac Antique

-----------------------


I am using the artwork of Keith Garvey

You buy his tubes here
MPT

-----------------------

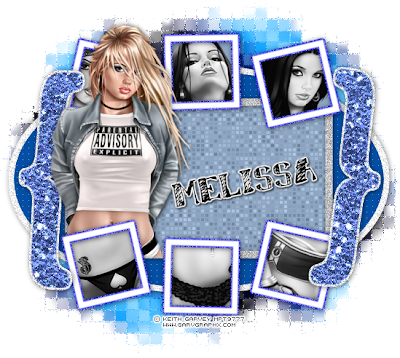
Open your template and all of your supplies and all of the tubes you'll be needing. Open up your main tube and place where you want it, add a drop down shadow and duplicate tube layer, drag the copied layer below the squares, go back to your normal layer and erase the parts you want to hide, make sure you touch up the copied layer as well. now use your magic you want and select the inside of each square one at a time, then selections> modify> expand by 2 copy & paste your tube inside the marching ants square, place the tube where you want, make sure both your head is on the top square, & body part on the bottom square, selections> invert, delete, then selections>none continue on each square

next go to your layer below your frame, select all> float> defloat , add new raster layer, flood fill color of choice, make sure your tubes layer is above these. once you've done all those, make sure your tube layers are below the frame, now turn them into black & white if you'd like, next add your plugin, xero radiance settings of choice,

select your frame layer, use gradient glow use color of choice, use your magic wand and select the outside and inside where the glow is, now add noise then add a drop down shadow.

select the brackets select all> float> defloat add your glitter style to your brackets or use add noise or flood fill, do the same as you did with the frames, use gradient glow, select outside parts with magic wand, add noise now give a drop down.

select inside the bigger square, select all> float> defloat , add new raster layer, flood fill color of choice, now add xero fritillary settings of choice... i just added noise to outer bigger square.

select the oval layer, select all> float> defloat , add new raster layer, flood fill color of choice, now add your color dot, setting of choice, select all> float> defloat , add new raster layer, flood fill color of choice add noise and drop down shadow.

add your mask, now add Texture Effect - Mosiac Antique, add your copyrights & name and save as a PNG.


Thanks for trying my tutorial. Now lets see those results, I hope you have enjoyed this tutorial!

-----------------------

This tutorial was written on January 24th, 2010 by Melissa.
In no way may this tutorial be copied to another website without the creators permission. Any resemblance to this tutorial is purely coincidental.


Monday, October 12, 2009

Biggest Fan


(sorry, highlight to see wordart it's black)

This tutorial was written in PSP 9 and can be
used with any other version. I assume that
you have a working knowledge of PSP.
-----------------------
Supplies Needed:

Template/wordart of choice or use mine i supplied, Please
don't use in any other tut without my permission.
My Template/wordart HERE
Font of choice.


Plugins Needed:
Xero - Radiance
PhotoEffex - Scanlines
Penta.com - color dot

-----------------------

I am using the artwork of Ismael Rac
You can visit his site HERE


-----------------------
Open up my template
now open your tubes, paste your main tube inside the circle,
cut off the excess tube, then use your radiance plugin.
Add a drop down shadow.


then use your magic wand and select each
tear drop, add a new rasyer layer and then flood fill each with
a color off your tubes now copy paste tube invert>delete do this for all 6 tears
mess around with the blend modes, add your radiance then mess
around with the opacity, add scanlines to the tubes only

select the background circle, use a gradident of choice
i used colors from my tubes, add new raster then flood fill,
now use your penta.com - color dot, select the outer circle new raster
flood fill white, or color of choice, and add noise
Now add your mask, if you would like one, add a drop
down shadow to your wordart

Resize, add your copyrights & name and save as a PNG.


Thanks for trying my tutorial.
Now lets see those results,
I hope you have enjoyed this tutorial!

-----------------------
This tutorial was written on October 12, 2009 by Melissa.
In no way may this tutorial be copied to another
website without the creators permission. Any resemblance
to this tutorial is purely coincidental.
Sunday, October 11, 2009

Hottie With a Body


This tutorial was written in PSP 9 and can be
used with any other version. I assume that
you have a working knowledge of PSP.
-----------------------
Supplies Needed:

Template of choice or use mine i supplied, Please
don't use in any other tut without my permission.
My template HERE
Mask of choice i used
WSL_Mask105
Font of choice.


Plugins Needed:
Xero - Radiance
Xenofex - Constellation

-----------------------

I am using the artwork of Ismael Rac
You can visit his site HERE


-----------------------
Open up my template
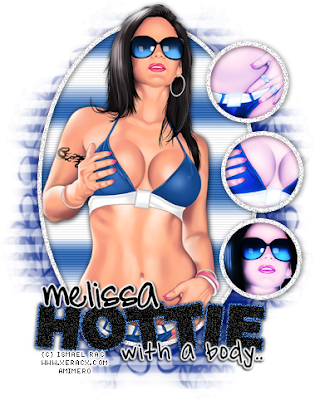
now open your tube, paste inside the circle, cut off the excess tube
Add a drop down shadow, then use your magic wand and select each
circle flood fill color of choice, or use the color provided,
now copy paste tube invert>delete do this for all 3 circles,
mess with the blend modes, then use your plugin
xero - radiance mess around with the opacity if to bright
Now add your mask


Resize, add your copyrights & name and save as a PNG.


Thanks for trying my tutorial.
Now lets see those results,
I hope you have enjoyed this tutorial!

-----------------------
This tutorial was written on October 10, 2009 by Melissa.
In no way may this tutorial be copied to another
website without the creators permission. Any resemblance
to this tutorial is purely coincidental.
Saturday, October 10, 2009

Sexy Skulls


This tutorial was written in PSP 9 and can be
used with any other version. I assume that
you have a working knowledge of PSP.
-----------------------
Supplies Needed:

Dingbat font of choice
@ dafont Skullz
CloseUp of choice
Mask of choice i used
Vix, Mask 281
Font of choice


Plugins Needed:
Eye Candy - Gradient Glow
MuRa's Meister - Copies
Xenofex - Constellation

-----------------------

I am using the artwork of Keith Garvey,
You can visit his site HERE

-----------------------
Open a 550x550 canvas
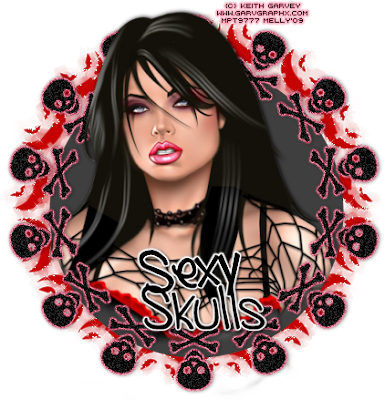
now open your tube , Go to your preset tool
and use your ellipse shape, draw out a semi big circle
Copy and paste your tube place where wanted, Add a drop down
shadow of your choice Then use your eraser tool and erase the rest off.

Now go to your text and choose a skull that you want,
go to your plugin gradient glow choose a color to glow around
your skulls, i choose pink the color of her lipstick, add noise if you want then
add a drop down shadow of choice. now use mura's meister
copies, use encircle and settings that fits right for you.

Now add 2 new raster layers, flood fill one white, and flood fill
the other color of choice, drag colored on top of white add your
mask of choice, then use xenofex - constellation settings of your choice.

Resize, add your copyrights & name and save as a PNG.


Thanks for trying my tutorial.
Now lets see those results,
I hope you have enjoyed this tutorial!

-----------------------
This tutorial was written on October 10, 2009 by Melissa.
In no way may this tutorial be copied to another
website without the creators permission. Any resemblance
to this tutorial is purely coincidental.
Wednesday, January 28, 2009

Rock N' Roll Love


This tutorial was written for those
that have a working knowledge of PSP.

Supplies Needed:
PSP 9 (any version will work)
Tube of choice
I used artwork by Rachel Huntington
If you would like to use his artwork please visit CILM
no scrap kits for this one, unless you want too
Template53 by Rachel HERE
Font of choice - Angelica
If this is your mask let me know so i can credit or
if you want me to take down HERE


Lets begin

Open up the template.


now open a upclose tube of choice, or a normal one

This tut is going to very easy so not alot of steps

All your really going to be doing is colorizing pieces of the template
just use colors from your tube, supplying colors i used from mine


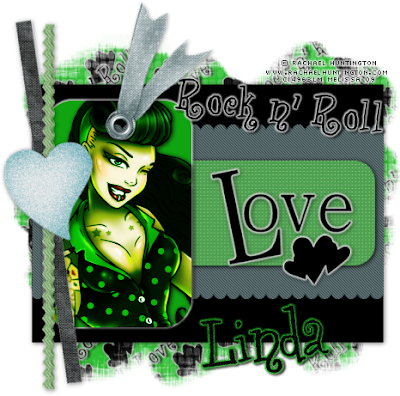
Click on the ricrac ribbon, select a color of choice i used #25bb29 now,
open the pallette again, now look for the H & S that is hue and saturation
you need them to colorize (how i do it) numbers are H - 85 , S - 171 now go to
adjust>hue and saturation>colorize now put in the numbers where they go,
sometimes the colors are darker then you want, just mess with the saturation
settings to anything i used whatever suited my taste


now with the other ribbon i kept it black, but i make it darker by going to adjust>
brightness and contrast> brightness/contrast using these settings, brightness - 11,
contrast - 33 this is optional


now just click on your other pieces, on the GreyRectangle i used this color #4fa251
colorize it the same way you did the ricrac ribbon, now the Scallop piece i used this
color #2c849b RibbonJoLuvsDogs i used the same color as the scallop i just
moved the saturation scale to where i thought it looked the best, i also used this
color for the heart, colorize all these


now give all of them a drop down shadow besides "white tag" now select the
white tag selections>float>defloat> add new raster layer, flood fill #10a410
select>none, click out of the white tag layer, click the green tag selections>float>
defloat> now mirrow tube then copy paste tube in the tag, place where you can
see the face, invert select>none, change blend mode to hard light, add a drop down
on tube, close out of all layers but your tube and green tag merge visible,
add a gradient glow then a drop down shadow


merge the wordart and heart together, close out all layers first, now add a gradient
glow to them if you want, settings glow width 3, soft corners 35, overall opacity 100,
color white give a drop down shadow, settings V&H - 1, opacity - 51, blur - 7 , black
add your text saying "Rock n' Roll"


add a new raster layer, flood fill color #25bb29, add mask, resize the mask to fit your tag
resize the whole tag add your copyright & your name, save as a png and your done!


Thanks for trying my tutoiral, I hope you have enjoyed it.

I would love to see what you make,
feel free to email at unique_stylez09@yahoo.com


This Tutorial was written 1/27/09.
And the concept of the tutorial is copyrighted.
Do not copy it in any way, pass out or re-write without permission.
The image you create using this tutorial is for you to do what you wish
except for monetary gains or for merchandising.
Any Resemblance to another tutorial is purely coincidental.
Friday, January 16, 2009

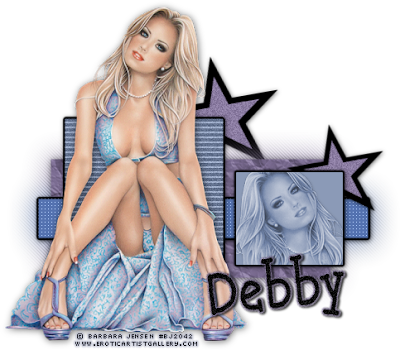
She's Soo Dreamy


This tutorial was written for those
that have a working knowledge of PSP.
Named by Nora, thanks girlie xox

Supplies Needed:
PSP 9 (any version will work)
Tube of choice
I used artwork by Barbara Jensen
If you would like to use her artwork please visit HERE
template#34 by Yvette HERE
Plugin(s) used, these are optional
Photoeffex - (scanlines) If you don't have
this plugin you can also use Texture effects - blinds
Eyecandy 4000 - (gradient glow)
Alien Skin Xenofex2 - (crumple)
Penta.com - (jeans) & (color dot)
& font of choice - i used GweetHmk


Lets begin

Open up the template.

Go to image> canvas Size> width/height - 600 will Resize later.


Click on the smaller square> selections> select all>float>defloat add a new raster layer,
flood fill color of choice i used #8b9ab7, selections>none, delete original layer

Click on the smaller square> selections> select all>float>defloat copy and paste tube
you'd like to use, move tube down so you can see the head, selections>invert>delete
then go to selections>none delete original layer. optional blend mode
set as - Luminance (L) lower opacity to about 50ish or which ever you like


x out of all the layers and merge the tube layer & flood filled layer
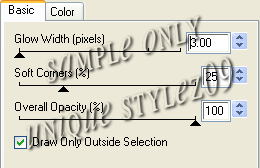
Open up your eye candy plugin and go to gradident glow Basic settins to this


click "color" tab and choose your color, i used black,
now drag arrow to desired spots, then click ok


unclick all the layers, select the second square> selections> select all>float>defloat
add a new raster layer, flood fill color of choice i used #8b9ab7, Now open
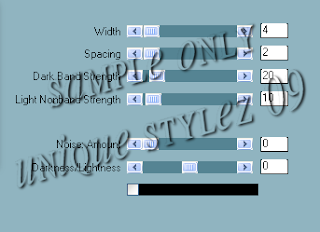
Photoeffex - (scanlines) i used these settings


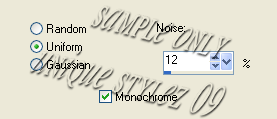
this is optional, go to adjust>add/remove noise>add noise

Use the same gradient glow settings as above.


Now move both merged squares above the "star" layers, this will
make the stars hide behind the squares, Select star3
selections> select all>float>defloat, add a new raster layer
flood fill color of choice i used #9889af Close out of the original layer
Do the same with the other star, or use a different color
Close out of all the layers and merge both purple stars and add noise.

Now for both bigger stars, selections> select all>float>defloat
add a new raster layer, flood fill black select>none. then delete original layer.

Click on the large rectangle> selections> select all>float>defloat add new layer
flood fill color of choice, i used the same purple, selections>invert>delete
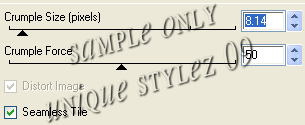
then go to selections>none delete original layer, use plugin alien skin-crumple.


Click on the thin background> selections> select all>float>defloat add new layer
flood fill color of choice, i used #5573b1 selections>invert>delete then go to
selections>none delete original layer, now use plugin penta.com - color dot.


Use the same black gradient glow settings as above.


Add drop down shadows to all layers if you haven't already, x out of
all layers besides the thin & large rectangle. merge layers, duplicate
click on the original layer then Blur>gaussian blur>Radius 25
still on same layer use plugin penta.com (jeans) and
use these settings amount - 62 , border width - 4


unclick all of the layers, resize your tube if needed 80%
add your main tube in front of the large rectangle
and add drop down shadow of choice


Resize the tag if you like, & add your copyright,
Add your name, save as a png and your done!


Thanks for trying my tutorial I hope you have enjoyed it.

I would love to see what you make,
feel free to email at unique_stylez09@yahoo.com


This Tutorial was written 1/16/09.
And the concept of the tutorial is copyrighted.
Do not copy it in any way, pass out or re-write without permission.
The image you create using this tutorial is for you to do what you wish
except for monetary gains or for merchandising.
Any Resemblance to another tutorial is purely coincidental.