
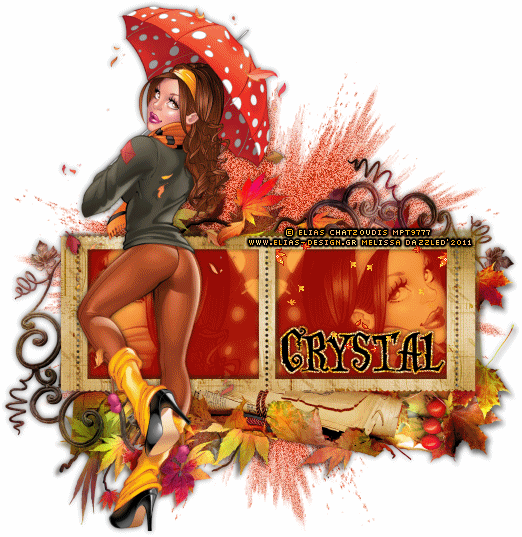
sorry had to make it small it kept cutting off it's not even that big of a tag grrr lol
This tutorial was written in PSP 9 and can be used with any other version.
I assume that you have a working knowledge of PSP.
-----------------------
Supplies Needed:
Tube of choice/close up
Awesome cluster frame by
Sarah at SaraPlays
Fonts & Mask of choice
I used WSL_Mask38
Weescotslass
Fall leaf floates of choice
Plugins needed are Optional:
xero - radiance
eye candy 4000 - HSB noise
-----------------------
I am using the artwork of Elias Chatzoudis
You buy his tubes here PTE
-----------------------
let's open the frame, resize down to 15% open a 550x550 canvas copy and paste your frame on your canvas, open your tube of choice decide where the frame is gonna look from behind your tube, give you tube a drop down shadow, use your magic wand tool, with your cluster frame layer clicked, click the inside of each frame, selections all>float>defloat>expand by 5 use your dropper tool and use a color of choice from your tube and add a new raster layer and flood fill your selection. selections none, drag your paper layer below your frame.
Now select your flood fill layer selections all>float>defloat> now use a close up tube of choice copy and paste your tube inside the marching ants, selections invert>hit delete, selections none. now drag your tube layer below your frame, change blend mode to overlay, select your tube layer change to black and white, adjust>hue & saturation>colorize make sure all sliders are set to Zero this turns images black and white. this makes the blend mode more intense, now use xero plugin radiance, settings of choice this is optional to use this plugin at all.
Now this is when i merged all of my layers, now add your mask color of choice, now make it to where your mask is on it's own layer, and your merged tag is on it's own. Add your copyrights, and add your name, Using your magic wand tool, settings point to point, not trace all around your leaves, now use your HSB noise plugin leave the settings as is and click ok, select none. click on your frame layer now go to adjust>add noise> settings at 60, or which ever number you want, but everytime you go back you need to take away 3 numbers or give 3 more numbers. depending how you want the animation to go. Now right click on your tag tab and hit copy merged, open your animation shop click the inside and hit paste as new animation, now let's go back edit>undo see the little arrow? Well on the top of your tool pallette right under "effects & adjust" You will see curled arrows, hit the one on the left a few times and watch as it undos your mask noise layer, keep going until you see the HSB noise get off your leaves so pay attention, your marching ants should still be around your leaves, now go back into HSB noise and click "random speed" go back and do your mask layer this time since we did 60 first drop down 3 times so you should now have 57, open your animation shop again, right click on your tag paste>after current frame. Now go back and do the last step all over again, but remember on HSB noise you hit random speed once again , and on your mask layer drop down 3 more numbers so it should be at 54, click on your second tag in animation shop paste>after current frame, now add your leaf floaties to your tag now right click again>view animation, save as a gif and you're done.
Now if my way of using animation is too confusing you are welcome to use your own way, i just think the way i do it is quick and easy (atleast in my eyes) since i do it all the time lol.
Thanks for trying my tutorial.
Now lets see those results,
I hope you have enjoyed this tutorial!
-----------------------
This tutorial was written on April 22nd, 2011 by Melissa.
In no way may this tutorial be copied to another
website without the creators permission. Any resemblance
to this tutorial is purely coincidental.
-----------------------
Supplies Needed:
Tube of choice/close up
Awesome cluster frame by
Sarah at SaraPlays
Fonts & Mask of choice
I used WSL_Mask38
Weescotslass
Fall leaf floates of choice
Plugins needed are Optional:
xero - radiance
eye candy 4000 - HSB noise
-----------------------
I am using the artwork of Elias Chatzoudis
You buy his tubes here PTE
-----------------------
let's open the frame, resize down to 15% open a 550x550 canvas copy and paste your frame on your canvas, open your tube of choice decide where the frame is gonna look from behind your tube, give you tube a drop down shadow, use your magic wand tool, with your cluster frame layer clicked, click the inside of each frame, selections all>float>defloat>expand by 5 use your dropper tool and use a color of choice from your tube and add a new raster layer and flood fill your selection. selections none, drag your paper layer below your frame.
Now select your flood fill layer selections all>float>defloat> now use a close up tube of choice copy and paste your tube inside the marching ants, selections invert>hit delete, selections none. now drag your tube layer below your frame, change blend mode to overlay, select your tube layer change to black and white, adjust>hue & saturation>colorize make sure all sliders are set to Zero this turns images black and white. this makes the blend mode more intense, now use xero plugin radiance, settings of choice this is optional to use this plugin at all.
Now this is when i merged all of my layers, now add your mask color of choice, now make it to where your mask is on it's own layer, and your merged tag is on it's own. Add your copyrights, and add your name, Using your magic wand tool, settings point to point, not trace all around your leaves, now use your HSB noise plugin leave the settings as is and click ok, select none. click on your frame layer now go to adjust>add noise> settings at 60, or which ever number you want, but everytime you go back you need to take away 3 numbers or give 3 more numbers. depending how you want the animation to go. Now right click on your tag tab and hit copy merged, open your animation shop click the inside and hit paste as new animation, now let's go back edit>undo see the little arrow? Well on the top of your tool pallette right under "effects & adjust" You will see curled arrows, hit the one on the left a few times and watch as it undos your mask noise layer, keep going until you see the HSB noise get off your leaves so pay attention, your marching ants should still be around your leaves, now go back into HSB noise and click "random speed" go back and do your mask layer this time since we did 60 first drop down 3 times so you should now have 57, open your animation shop again, right click on your tag paste>after current frame. Now go back and do the last step all over again, but remember on HSB noise you hit random speed once again , and on your mask layer drop down 3 more numbers so it should be at 54, click on your second tag in animation shop paste>after current frame, now add your leaf floaties to your tag now right click again>view animation, save as a gif and you're done.
Now if my way of using animation is too confusing you are welcome to use your own way, i just think the way i do it is quick and easy (atleast in my eyes) since i do it all the time lol.
Thanks for trying my tutorial.
Now lets see those results,
I hope you have enjoyed this tutorial!
-----------------------
This tutorial was written on April 22nd, 2011 by Melissa.
In no way may this tutorial be copied to another
website without the creators permission. Any resemblance
to this tutorial is purely coincidental.
No comments:
Post a Comment