This tutorial was written in PSP 9 and can be used with any other version. I assume that you have a working knowledge of PSP.
-----------------------
Supplies Needed:
Tube of choice/close up
PTU Scrap kit by Inzpired Creationz
"Horny Lil Devil" Click Here
font: Gimme danger
Plugins Optional:
-----------------------
Supplies Needed:
Tube of choice/close up
PTU Scrap kit by Inzpired Creationz
"Horny Lil Devil" Click Here
font: Gimme danger
Plugins Optional:
xero - radiance
penta.com - color dots
-----------------------
I am using the art of Mark Wasyl, He doesn't sell his tubes anymore sadly
But you can find his artwork Here
-----------------------
*may be difficult*
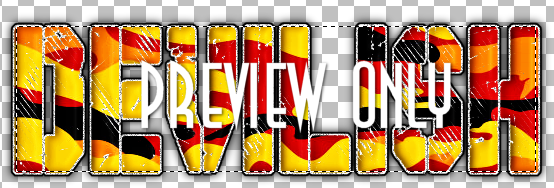
Let's open a 600x600 canvas, bring out your text tool and type out in caps DEVILISH. in the font i used, or a thick soild font. once you got that typed out, i used the deform tool around it and i stretched out the word alittle bigger where i wanted it to go. Layers- convert to raster layer. selections- all- float- defloat. copy and paste your paper of choice, selections- invert- delete. select none. now remove the original layer (font) selecting the paper layer now. Selections- all- float- defloat- modify- expand by 3, add a new raster layer flood fill color of choice. i choose white. selections none. drag below your devilish paper layer.
Now on the white layer adjust- add/remove noise- add noise. settings of choice. on this layer. Selections float- defloat modify- expand by 2 add a new raster layer again now flood fill black. selections none. drag below all of your layers. duplicate the black now add a slight drop shadow. Now with your paper layer selected. Effects- 3D effects- inner bevel settings of choice. Your text should look something like this.

Now it's time to merge all of your layers. now i want you to go to your selections tool, the one that looks like a square, selection type: rectangle. mode: add (shift) feather: 0 Now i want you to start your tool at the top left of the D but on the text only don't go over the white part. Should look something like this with all of the marking ants around your text

Now add a new raster layer floor fill color of choice. i choose black. selections none. now drag this layer below your text layer.i want you to open your chicken wire element. Resize first if needed, now With your black layer selected, selections all- float- defloat now copy your wire element and paste on top of the black, while marching ants still up, paste more that one using your move tool sliding the wire where you'd like. I left my font up so i could see where the chicken wire would show through.
Once you've got all the pieces where you'd like, selections- invert- delete now do this on each layer of your chicken wire, to remove any excess. now select none. i did the same steps as the chicken wire element and i added the tube on the black layer with penta.com- color dots. I won't be explaining this. If you want this go ahead and do this now.
Now it's time to add the elements. I used the biting lips, vector flames, devil tail, cherry cupcake, skull, hand cuffs, skull bow, spiked collar, chicken wire, sparkles 2, paper 12. Now resize these other elements, place them where you'd like or use my tag as a guide. after i added all of my elements, i then placed my main tube off to the side to hide the excess of the tube. Then after all of this i typed out "Inside" added noise, drop shadow and placed in front of the tube i used, which i added a slight radiance to the main tube and drop shadow.
Now add your copyrights, add your name and save as a png and you’re done!
penta.com - color dots
-----------------------
I am using the art of Mark Wasyl, He doesn't sell his tubes anymore sadly
But you can find his artwork Here
-----------------------
*may be difficult*
Let's open a 600x600 canvas, bring out your text tool and type out in caps DEVILISH. in the font i used, or a thick soild font. once you got that typed out, i used the deform tool around it and i stretched out the word alittle bigger where i wanted it to go. Layers- convert to raster layer. selections- all- float- defloat. copy and paste your paper of choice, selections- invert- delete. select none. now remove the original layer (font) selecting the paper layer now. Selections- all- float- defloat- modify- expand by 3, add a new raster layer flood fill color of choice. i choose white. selections none. drag below your devilish paper layer.
Now on the white layer adjust- add/remove noise- add noise. settings of choice. on this layer. Selections float- defloat modify- expand by 2 add a new raster layer again now flood fill black. selections none. drag below all of your layers. duplicate the black now add a slight drop shadow. Now with your paper layer selected. Effects- 3D effects- inner bevel settings of choice. Your text should look something like this.

Now it's time to merge all of your layers. now i want you to go to your selections tool, the one that looks like a square, selection type: rectangle. mode: add (shift) feather: 0 Now i want you to start your tool at the top left of the D but on the text only don't go over the white part. Should look something like this with all of the marking ants around your text

Now add a new raster layer floor fill color of choice. i choose black. selections none. now drag this layer below your text layer.i want you to open your chicken wire element. Resize first if needed, now With your black layer selected, selections all- float- defloat now copy your wire element and paste on top of the black, while marching ants still up, paste more that one using your move tool sliding the wire where you'd like. I left my font up so i could see where the chicken wire would show through.
Once you've got all the pieces where you'd like, selections- invert- delete now do this on each layer of your chicken wire, to remove any excess. now select none. i did the same steps as the chicken wire element and i added the tube on the black layer with penta.com- color dots. I won't be explaining this. If you want this go ahead and do this now.
Now it's time to add the elements. I used the biting lips, vector flames, devil tail, cherry cupcake, skull, hand cuffs, skull bow, spiked collar, chicken wire, sparkles 2, paper 12. Now resize these other elements, place them where you'd like or use my tag as a guide. after i added all of my elements, i then placed my main tube off to the side to hide the excess of the tube. Then after all of this i typed out "Inside" added noise, drop shadow and placed in front of the tube i used, which i added a slight radiance to the main tube and drop shadow.
Now add your copyrights, add your name and save as a png and you’re done!
Here is another example using a different tube

Thanks for trying my tutorial.
Now lets see those results.
----------------------
This tutorial was written on August 24th, 2013 by Melissa.
In no way may this tutorial be copied to another
website without the creators permission. Any resemblance
to this tutorial is purely coincidental.


No comments:
Post a Comment