

This tutorial was written in PSP 9 and can be used with any other version. I assume that you have a working knowledge of PSP.
-----------------------
Supplies Needed:
Tube of choice/close up
FTU Scrap kit by Topcat Tagz
"Hope, Courage, Strength" Creative Misfits
WSL_Mask238
font of choice
Plugins Optional:
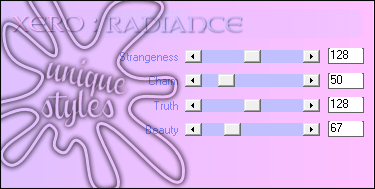
xero - radiance
penta.com - color dot
Code Word: When ever i say "delete" You
are selecting delete on your keyboard under insert.
-----------------------
I am using the art of Very Many
You can find her work Here
-----------------------
*easy working with layers*
Let's your frame (element 15) resize down 80% Image- rotate- rotate clockwise 90, Image- mirror, Image- canvas size set at 600x600. using your magic wand click inside of the frame and inside the ribbon loops. selections- modify- expand by 7. choose paper of choice. i used paper 9, paste on canvas, selections- invert- delete. select none drag below frame layer.
While your paper layer is selected, selections all- float- defloat open your close up tube of choice, copy and paste on canvas. use your move tool to drag the tube where you want inside the marching ants. selections- invert- delete. select none. drag your tube(s) layers below your frame. changing blend mode to screen. for a deeper effect, Effects- hue and saturation- colorize both dials set at zero. add radiance and color dot settings of choice.
Add a slight drop shadow to your frame. now merge all layers. Opening your main tube. resize if needed, place off to the side like i did. i added radiance, and a D/S
A pink layered shirt wasn't on this tube. I choose the purple layer,
I then changed the color pink, this is the color i used.

now it's time for the elements, I used the heart hope paper. butterfly, pink ribbon i colorized it purple. lips. cluster of flowers, teddy bear, camera, staple, bracelettes, frame, paper 9 and 2. resize your elements down, place them where you want or use my tag as a guide.
Now add your mask, copyrights, add your name and save as a png and you’re done!
Thanks for trying my tutorial.
Now lets see those results.
----------------------
Updated** 9/25/2014
This tutorial was written on November 19th, 2013 by Melissa.
In no way may this tutorial be copied to another
website without the creators permission. Any resemblance
to this tutorial is purely coincidental.
-----------------------
Supplies Needed:
Tube of choice/close up
FTU Scrap kit by Topcat Tagz
"Hope, Courage, Strength" Creative Misfits
WSL_Mask238
font of choice
Plugins Optional:
xero - radiance
penta.com - color dot
Code Word: When ever i say "delete" You
are selecting delete on your keyboard under insert.
-----------------------
I am using the art of Very Many
You can find her work Here
-----------------------
*easy working with layers*
Let's your frame (element 15) resize down 80% Image- rotate- rotate clockwise 90, Image- mirror, Image- canvas size set at 600x600. using your magic wand click inside of the frame and inside the ribbon loops. selections- modify- expand by 7. choose paper of choice. i used paper 9, paste on canvas, selections- invert- delete. select none drag below frame layer.
While your paper layer is selected, selections all- float- defloat open your close up tube of choice, copy and paste on canvas. use your move tool to drag the tube where you want inside the marching ants. selections- invert- delete. select none. drag your tube(s) layers below your frame. changing blend mode to screen. for a deeper effect, Effects- hue and saturation- colorize both dials set at zero. add radiance and color dot settings of choice.
Add a slight drop shadow to your frame. now merge all layers. Opening your main tube. resize if needed, place off to the side like i did. i added radiance, and a D/S
A pink layered shirt wasn't on this tube. I choose the purple layer,
I then changed the color pink, this is the color i used.
now it's time for the elements, I used the heart hope paper. butterfly, pink ribbon i colorized it purple. lips. cluster of flowers, teddy bear, camera, staple, bracelettes, frame, paper 9 and 2. resize your elements down, place them where you want or use my tag as a guide.
Now add your mask, copyrights, add your name and save as a png and you’re done!
Thanks for trying my tutorial.
Now lets see those results.
----------------------
Updated** 9/25/2014
This tutorial was written on November 19th, 2013 by Melissa.
In no way may this tutorial be copied to another
website without the creators permission. Any resemblance
to this tutorial is purely coincidental.
No comments:
Post a Comment