

This tutorial was written in PSP 9 and can be used with any other version. I assume that you have a working knowledge of PSP.
-----------------------
Supplies Needed:
Tube of choice/close up
PTU Scrap kit by Designs by Sarah
"Enjoy Your Flight" At PMTW/S
Template 502 by Millie
Millie's PSP Madness
Mask set 5_3 by Rachel
Rocked by Rachel
Font of choice
Rosarian
Plugins Optional:
xero - radiance
"Delete" on your keyboard under Insert.
-----------------------
I used the artwork on Dominic Marco
You can find his artwork Here
-----------------------
Supplies Needed:
Tube of choice/close up
PTU Scrap kit by Designs by Sarah
"Enjoy Your Flight" At PMTW/S
Template 502 by Millie
Millie's PSP Madness
Mask set 5_3 by Rachel
Rocked by Rachel
Font of choice
Rosarian
Plugins Optional:
xero - radiance
"Delete" on your keyboard under Insert.
-----------------------
I used the artwork on Dominic Marco
You can find his artwork Here
(Sorry i realize he only has a few older/newer tubes up)
This tube was bought while he was with CILM
-----------------------
*Working with multiply layers (template)*
Open your template remove copy rights, layers 10, 9.
Reize your template, my percentage was 85% & 90%
then i went to Image- canvas size at 600x600
Now open all of the papers you plan to use 6 temp layers so 6 papers.
Now let's start with layer 8 and work your way back once you start
Selections- all- float- defloat copy & paste paper as new layer.
selections- invert- delete- select none, delete the original layer
(template layer) and add a slight drop shadow.
You will be doing the above step on all of your template layers..
no need to explain this. But on layers 5 & 4 i used the same papers.
and 2 & 1 used another same paper on both pieces.
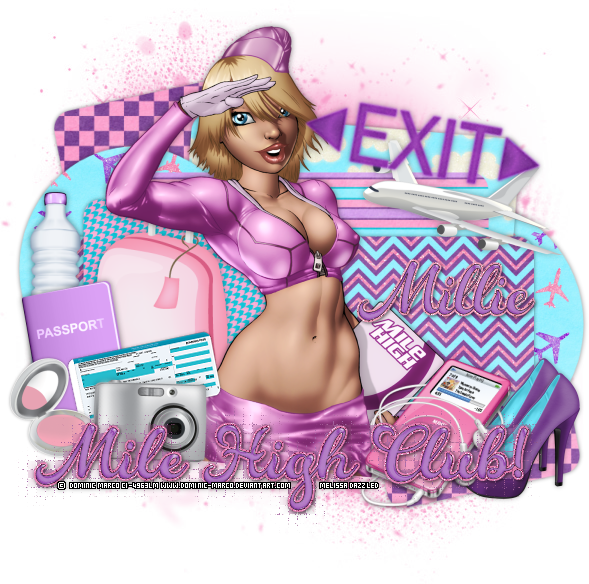
Now add your tube of choice. add slight drop shadow,
radiance settings: 85, 50, 128, 49 You can mess around with the settings.
I placed the tube kinda in the middle.
Now it's time to add your elements. I used, camera, ipod, high heels2 , passport, water bottle, exit sign, plane2, luggage2, boarding pass, blush compact, papers 3,4,7,8,9 and 10
Resize your elements place them where you want or use my tag as a guide.
Now type out the words "Mile High Club" add your own effects.
Add your copyrights, mask, your name and you're done!
Thanks for trying my tutorial.
Now lets see those results.
----------------------
This tutorial was written on May 1st, 2014 by Melissa.
In no way may this tutorial be copied to another
website without the creators permission. Any resemblance
to this tutorial is purely coincidental.
You will be doing the above step on all of your template layers..
no need to explain this. But on layers 5 & 4 i used the same papers.
and 2 & 1 used another same paper on both pieces.
Now add your tube of choice. add slight drop shadow,
radiance settings: 85, 50, 128, 49 You can mess around with the settings.
I placed the tube kinda in the middle.
Now it's time to add your elements. I used, camera, ipod, high heels2 , passport, water bottle, exit sign, plane2, luggage2, boarding pass, blush compact, papers 3,4,7,8,9 and 10
Resize your elements place them where you want or use my tag as a guide.
Now type out the words "Mile High Club" add your own effects.
Add your copyrights, mask, your name and you're done!
Thanks for trying my tutorial.
Now lets see those results.
----------------------
This tutorial was written on May 1st, 2014 by Melissa.
In no way may this tutorial be copied to another
website without the creators permission. Any resemblance
to this tutorial is purely coincidental.
I love it! Thank you so much for mine :)
ReplyDelete