

This tutorial was written in PSP 9 and can be used with any other version. I assume that you have a working knowledge of PSP.
-----------------------
Supplies Needed:
Tube of choice/close up
PTU Scrap kit by Toxic Desirez
"Valetine Zombie" Purchase at SCShop
This is just one of the kits from the Zombie collab
Packed with an amazing tube from Freya, CU items, 2 Scrapkits
Font of choice
respective
Temp283 by Kristin
Toxic Desirez
Mask of choice
none
Plugins Optional:
penta.com - jeans
screenworks - dot screen
red paw media - beautifier
Tutorial shortcut index:
"Delete" on your keyboard under Insert.
"C/P" copy and paste as new layer.
Remove "O/L" Remove original layer.
"D/P" Drop shadow located in 3D effects.
"R/S" Resize layer located in Image.
New "R/L" Raster layer, in Layers.
"F/F" Flood fill (paint bucket) tool.
"outer glow" Gradient glow from eye candy
Or my method on my blog under "How to dos"
Good D/P settings:
0, 0, 57, 6, color black
Good add noise settings:
Uniform- 70-90 % noise monochrome
Random- 10-34% noise monochrome
-----------------------
I used the artwork of Freya Langford-Sidebottom
This is an exclusive for smiley creations shop
It comes in a zombie-lovin collab! Human/Zombie layers
You can find her artwork Here
-----------------------
Open template R/S 80%, Images-canvas size 600x600
Remove copyrights, raster 10, 3 an copy of raster 3
Select raster2, selections- all- float- defloat, paper5 -R/S 80%- C/P
selections- invert- delete, remove O/L, I appled more noise to
copy of raster 2, then i apple your drop shadow
Select raster8, selections- all- float- defloat, paper8 -R/S 80% C/P
selections- invert- delete, select none remove O/L, add outer glow then D/P
Select copyraster8, selections- all- float- defloat, paper8 - C/P
selections- invert- delete,select none remove O/L, add outer glow then D/P
Select raster6, selections- all- float- defloat, paper1 -R/S 80% C/P
selections- invert- delete, select none remove O/L, add outer glow then D/P
Select copyraster6, selections- all- float- defloat, paper1 - C/P
selections- invert- delete, select none remove O/L, add outer glow then D/P
Select raster4, selections- all- float- defloat, paper9-R/S 80% - C/P
selections- invert- delete, select none remove O/L, add outer glow then D/P
Select copyraster4, selections- all- float- defloat, paper9 - C/P
selections- invert- delete, select none remove O/L, add outer glow then D/P
Select copyraster7, selections- all- float- defloat, paper10-R/S 80%- C/P
selections- invert- delete, select none remove O/L, add outer glow then D/P
Select copyraster7, selections- all- float- defloat, paper10 - C/P
selections- invert- delete, select noneremove O/L, add outer glow then D/P
Select raster5, selections- all- float- defloat, add new R/L Using your F/F tool
fill colors of choice, i did half black the other pink, select none. add outer glow then D/P
I also added a close up tube inside this circle. pink side got blend mode screen
I also went to brightness contrast settings, 11 bright, 30 contrast
while the black side i turned the tube greyscale lowering opacity 60%
I then also added bright/contrast, settings b-6, c-30, this is optional
Plugins i added to each side, pink side screenworks - dot screen
pent.com - jeans on the black side. these are also optional
Now it's element time
Elements i used and the resized %
Using this drop shadow: 0, 0, 61, 5, color black
Wordart2 - 70%
Balloons - 30%
Zombie noms - 30%
Cuppy1 - 25%
Finger - 20%
Guts - 25%
Heart2 - 25%
Brain - 30%
Ribs - 20%
Foot - 20%
Sparkles - 40%
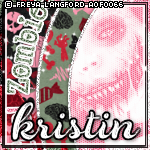
place elements where you want, or use my tag as a guide.
After i merged my tag i added red paw media beautifer plugin
settings: 50, 50, 32, 100, or use settings of choice
Apply your mask- add copyrights, your name save as a PNG
You're done!
-----------------------
Supplies Needed:
Tube of choice/close up
PTU Scrap kit by Toxic Desirez
"Valetine Zombie" Purchase at SCShop
This is just one of the kits from the Zombie collab
Packed with an amazing tube from Freya, CU items, 2 Scrapkits
Font of choice
respective
Temp283 by Kristin
Toxic Desirez
Mask of choice
none
Plugins Optional:
penta.com - jeans
screenworks - dot screen
red paw media - beautifier
Tutorial shortcut index:
"Delete" on your keyboard under Insert.
"C/P" copy and paste as new layer.
Remove "O/L" Remove original layer.
"D/P" Drop shadow located in 3D effects.
"R/S" Resize layer located in Image.
New "R/L" Raster layer, in Layers.
"F/F" Flood fill (paint bucket) tool.
"outer glow" Gradient glow from eye candy
Or my method on my blog under "How to dos"
Good D/P settings:
0, 0, 57, 6, color black
Good add noise settings:
Uniform- 70-90 % noise monochrome
Random- 10-34% noise monochrome
-----------------------
I used the artwork of Freya Langford-Sidebottom
This is an exclusive for smiley creations shop
It comes in a zombie-lovin collab! Human/Zombie layers
You can find her artwork Here
-----------------------
Open template R/S 80%, Images-canvas size 600x600
Remove copyrights, raster 10, 3 an copy of raster 3
Select raster2, selections- all- float- defloat, paper5 -R/S 80%- C/P
selections- invert- delete, remove O/L, I appled more noise to
copy of raster 2, then i apple your drop shadow
Select raster8, selections- all- float- defloat, paper8 -R/S 80% C/P
selections- invert- delete, select none remove O/L, add outer glow then D/P
Select copyraster8, selections- all- float- defloat, paper8 - C/P
selections- invert- delete,select none remove O/L, add outer glow then D/P
Select raster6, selections- all- float- defloat, paper1 -R/S 80% C/P
selections- invert- delete, select none remove O/L, add outer glow then D/P
Select copyraster6, selections- all- float- defloat, paper1 - C/P
selections- invert- delete, select none remove O/L, add outer glow then D/P
Select raster4, selections- all- float- defloat, paper9-R/S 80% - C/P
selections- invert- delete, select none remove O/L, add outer glow then D/P
Select copyraster4, selections- all- float- defloat, paper9 - C/P
selections- invert- delete, select none remove O/L, add outer glow then D/P
Select copyraster7, selections- all- float- defloat, paper10-R/S 80%- C/P
selections- invert- delete, select none remove O/L, add outer glow then D/P
Select copyraster7, selections- all- float- defloat, paper10 - C/P
selections- invert- delete, select noneremove O/L, add outer glow then D/P
Select raster5, selections- all- float- defloat, add new R/L Using your F/F tool
fill colors of choice, i did half black the other pink, select none. add outer glow then D/P
I also added a close up tube inside this circle. pink side got blend mode screen
I also went to brightness contrast settings, 11 bright, 30 contrast
while the black side i turned the tube greyscale lowering opacity 60%
I then also added bright/contrast, settings b-6, c-30, this is optional
Plugins i added to each side, pink side screenworks - dot screen
pent.com - jeans on the black side. these are also optional
Now it's element time
Elements i used and the resized %
Using this drop shadow: 0, 0, 61, 5, color black
Wordart2 - 70%
Balloons - 30%
Zombie noms - 30%
Cuppy1 - 25%
Finger - 20%
Guts - 25%
Heart2 - 25%
Brain - 30%
Ribs - 20%
Foot - 20%
Sparkles - 40%
place elements where you want, or use my tag as a guide.
After i merged my tag i added red paw media beautifer plugin
settings: 50, 50, 32, 100, or use settings of choice
Apply your mask- add copyrights, your name save as a PNG
You're done!


Thanks for trying my tutorial.
Now lets see those results.
----------------------
This tutorial was written on Feb. 20th, 2015 by Melissa.
In no way may this tutorial be copied to another
website without the creators permission. Any resemblance
to this tutorial is purely coincidental.
No comments:
Post a Comment