

This tutorial was written for those
that have a working knowledge of PSP.
Named by Nora, thanks girlie xox
Supplies Needed:
PSP 9 (any version will work)
Tube of choice
I used artwork by Barbara Jensen
If you would like to use her artwork please visit HERE
template#34 by Yvette HERE
Plugin(s) used, these are optional
Photoeffex - (scanlines) If you don't have
this plugin you can also use Texture effects - blinds
Eyecandy 4000 - (gradient glow)
Alien Skin Xenofex2 - (crumple)
Penta.com - (jeans) & (color dot)
& font of choice - i used GweetHmk
Lets begin
Open up the template.
Go to image> canvas Size> width/height - 600 will Resize later.
Click on the smaller square> selections> select all>float>defloat add a new raster layer,
flood fill color of choice i used #8b9ab7, selections>none, delete original layer
Click on the smaller square> selections> select all>float>defloat copy and paste tube
you'd like to use, move tube down so you can see the head, selections>invert>delete
then go to selections>none delete original layer. optional blend mode
set as - Luminance (L) lower opacity to about 50ish or which ever you like
x out of all the layers and merge the tube layer & flood filled layer
Open up your eye candy plugin and go to gradident glow Basic settins to this
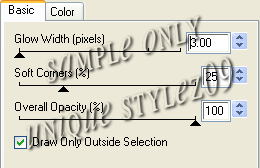
click "color" tab and choose your color, i used black,
now drag arrow to desired spots, then click ok
unclick all the layers, select the second square> selections> select all>float>defloat
add a new raster layer, flood fill color of choice i used #8b9ab7, Now open
Photoeffex - (scanlines) i used these settings
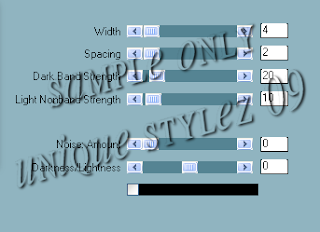
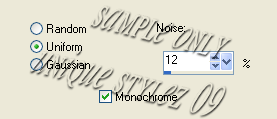
this is optional, go to adjust>add/remove noise>add noise
Use the same gradient glow settings as above.
Now move both merged squares above the "star" layers, this will
make the stars hide behind the squares, Select star3
selections> select all>float>defloat, add a new raster layer
flood fill color of choice i used #9889af Close out of the original layer
Do the same with the other star, or use a different color
Close out of all the layers and merge both purple stars and add noise.
Now for both bigger stars, selections> select all>float>defloat
add a new raster layer, flood fill black select>none. then delete original layer.
Click on the large rectangle> selections> select all>float>defloat add new layer
flood fill color of choice, i used the same purple, selections>invert>delete
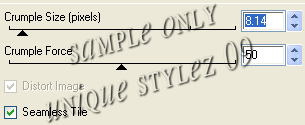
then go to selections>none delete original layer, use plugin alien skin-crumple.
Click on the thin background> selections> select all>float>defloat add new layer
flood fill color of choice, i used #5573b1 selections>invert>delete then go to
selections>none delete original layer, now use plugin penta.com - color dot.
Use the same black gradient glow settings as above.
Add drop down shadows to all layers if you haven't already, x out of
all layers besides the thin & large rectangle. merge layers, duplicate
click on the original layer then Blur>gaussian blur>Radius 25
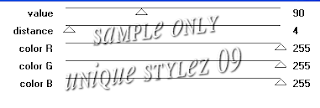
still on same layer use plugin penta.com (jeans) and
use these settings amount - 62 , border width - 4
unclick all of the layers, resize your tube if needed 80%
add your main tube in front of the large rectangle
and add drop down shadow of choice
Resize the tag if you like, & add your copyright,
Add your name, save as a png and your done!
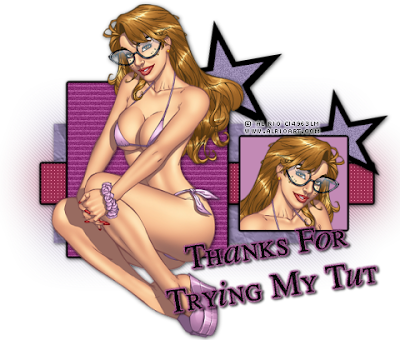
Thanks for trying my tutorial I hope you have enjoyed it.
I would love to see what you make,
feel free to email at unique_stylez09@yahoo.com
This Tutorial was written 1/16/09.
And the concept of the tutorial is copyrighted.
Do not copy it in any way, pass out or re-write without permission.
The image you create using this tutorial is for you to do what you wish
except for monetary gains or for merchandising.
Any Resemblance to another tutorial is purely coincidental.
that have a working knowledge of PSP.
Named by Nora, thanks girlie xox
Supplies Needed:
PSP 9 (any version will work)
Tube of choice
I used artwork by Barbara Jensen
If you would like to use her artwork please visit HERE
template#34 by Yvette HERE
Plugin(s) used, these are optional
Photoeffex - (scanlines) If you don't have
this plugin you can also use Texture effects - blinds
Eyecandy 4000 - (gradient glow)
Alien Skin Xenofex2 - (crumple)
Penta.com - (jeans) & (color dot)
& font of choice - i used GweetHmk
Lets begin
Open up the template.
Go to image> canvas Size> width/height - 600 will Resize later.
Click on the smaller square> selections> select all>float>defloat add a new raster layer,
flood fill color of choice i used #8b9ab7, selections>none, delete original layer
Click on the smaller square> selections> select all>float>defloat copy and paste tube
you'd like to use, move tube down so you can see the head, selections>invert>delete
then go to selections>none delete original layer. optional blend mode
set as - Luminance (L) lower opacity to about 50ish or which ever you like
x out of all the layers and merge the tube layer & flood filled layer
Open up your eye candy plugin and go to gradident glow Basic settins to this

click "color" tab and choose your color, i used black,
now drag arrow to desired spots, then click ok
unclick all the layers, select the second square> selections> select all>float>defloat
add a new raster layer, flood fill color of choice i used #8b9ab7, Now open
Photoeffex - (scanlines) i used these settings

this is optional, go to adjust>add/remove noise>add noise

Use the same gradient glow settings as above.
Now move both merged squares above the "star" layers, this will
make the stars hide behind the squares, Select star3
selections> select all>float>defloat, add a new raster layer
flood fill color of choice i used #9889af Close out of the original layer
Do the same with the other star, or use a different color
Close out of all the layers and merge both purple stars and add noise.
Now for both bigger stars, selections> select all>float>defloat
add a new raster layer, flood fill black select>none. then delete original layer.
Click on the large rectangle> selections> select all>float>defloat add new layer
flood fill color of choice, i used the same purple, selections>invert>delete
then go to selections>none delete original layer, use plugin alien skin-crumple.

Click on the thin background> selections> select all>float>defloat add new layer
flood fill color of choice, i used #5573b1 selections>invert>delete then go to
selections>none delete original layer, now use plugin penta.com - color dot.

Use the same black gradient glow settings as above.
Add drop down shadows to all layers if you haven't already, x out of
all layers besides the thin & large rectangle. merge layers, duplicate
click on the original layer then Blur>gaussian blur>Radius 25
still on same layer use plugin penta.com (jeans) and
use these settings amount - 62 , border width - 4
unclick all of the layers, resize your tube if needed 80%
add your main tube in front of the large rectangle
and add drop down shadow of choice
Resize the tag if you like, & add your copyright,
Add your name, save as a png and your done!

Thanks for trying my tutorial I hope you have enjoyed it.
I would love to see what you make,
feel free to email at unique_stylez09@yahoo.com
And the concept of the tutorial is copyrighted.
Do not copy it in any way, pass out or re-write without permission.
The image you create using this tutorial is for you to do what you wish
except for monetary gains or for merchandising.
Any Resemblance to another tutorial is purely coincidental.
No comments:
Post a Comment