This tutorial was written in PSP 9 and can be used with any other version.
I assume that you have a working knowledge of PSP.
I assume that you have a working knowledge of PSP.
-----------------------
Supplies Needed:
4 tubes of choice
Template 77 by Melissa'z Creationz
She has great templates HERE
Glitter style of choice
Mask - WSL_Mask218 HERE
Font of choice i used - sketchy
Plugins Needed Optional:
Eye Candy 4000 - gradient glow
Xero - Radiance
Xero - Fritillary
Penta.com - color dot
PSP Effects
Texture Effect - Mosiac Antique
-----------------------
I am using the artwork of Keith Garvey
You buy his tubes here MPT
-----------------------
next go to your layer below your frame, select all> float> defloat , add new raster layer, flood fill color of choice, make sure your tubes layer is above these. once you've done all those, make sure your tube layers are below the frame, now turn them into black & white if you'd like, next add your plugin, xero radiance settings of choice,
select your frame layer, use gradient glow use color of choice, use your magic wand and select the outside and inside where the glow is, now add noise then add a drop down shadow.
select the brackets select all> float> defloat add your glitter style to your brackets or use add noise or flood fill, do the same as you did with the frames, use gradient glow, select outside parts with magic wand, add noise now give a drop down.
select inside the bigger square, select all> float> defloat , add new raster layer, flood fill color of choice, now add xero fritillary settings of choice... i just added noise to outer bigger square.
select the oval layer, select all> float> defloat , add new raster layer, flood fill color of choice, now add your color dot, setting of choice, select all> float> defloat , add new raster layer, flood fill color of choice add noise and drop down shadow.
add your mask, now add Texture Effect - Mosiac Antique, add your copyrights & name and save as a PNG.
Thanks for trying my tutorial. Now lets see those results, I hope you have enjoyed this tutorial!
-----------------------
This tutorial was written on January 24th, 2010 by Melissa. In no way may this tutorial be copied to another website without the creators permission. Any resemblance to this tutorial is purely coincidental.
Supplies Needed:
4 tubes of choice
Template 77 by Melissa'z Creationz
She has great templates HERE
Glitter style of choice
Mask - WSL_Mask218 HERE
Font of choice i used - sketchy
Plugins Needed Optional:
Eye Candy 4000 - gradient glow
Xero - Radiance
Xero - Fritillary
Penta.com - color dot
PSP Effects
Texture Effect - Mosiac Antique
-----------------------
I am using the artwork of Keith Garvey
You buy his tubes here MPT
-----------------------
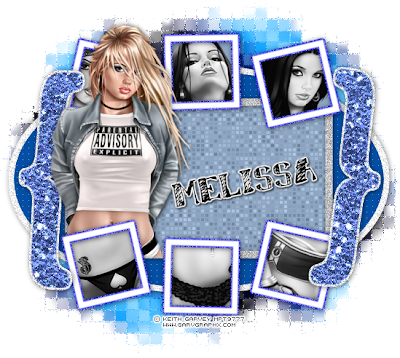
Open your template and all of your supplies and all of the tubes you'll be needing. Open up your main tube and place where you want it, add a drop down shadow and duplicate tube layer, drag the copied layer below the squares, go back to your normal layer and erase the parts you want to hide, make sure you touch up the copied layer as well. now use your magic you want and select the inside of each square one at a time, then selections> modify> expand by 2 copy & paste your tube inside the marching ants square, place the tube where you want, make sure both your head is on the top square, & body part on the bottom square, selections> invert, delete, then selections>none continue on each square
next go to your layer below your frame, select all> float> defloat , add new raster layer, flood fill color of choice, make sure your tubes layer is above these. once you've done all those, make sure your tube layers are below the frame, now turn them into black & white if you'd like, next add your plugin, xero radiance settings of choice,
select your frame layer, use gradient glow use color of choice, use your magic wand and select the outside and inside where the glow is, now add noise then add a drop down shadow.
select the brackets select all> float> defloat add your glitter style to your brackets or use add noise or flood fill, do the same as you did with the frames, use gradient glow, select outside parts with magic wand, add noise now give a drop down.
select inside the bigger square, select all> float> defloat , add new raster layer, flood fill color of choice, now add xero fritillary settings of choice... i just added noise to outer bigger square.
select the oval layer, select all> float> defloat , add new raster layer, flood fill color of choice, now add your color dot, setting of choice, select all> float> defloat , add new raster layer, flood fill color of choice add noise and drop down shadow.
add your mask, now add Texture Effect - Mosiac Antique, add your copyrights & name and save as a PNG.
Thanks for trying my tutorial. Now lets see those results, I hope you have enjoyed this tutorial!
-----------------------
This tutorial was written on January 24th, 2010 by Melissa. In no way may this tutorial be copied to another website without the creators permission. Any resemblance to this tutorial is purely coincidental.

No comments:
Post a Comment