-->
This tutorial was written in PSP 9 and can be used with any other version.
I assume that you have a working knowledge of PSP.
-----------------------
Supplies Needed:
Tubes/close ups of choice
Scrapkit used My First Expression
Kimberly’s kit you can find HERE
font of choice i used Squire
film strip of choice I don’t remember where mine
came from so I can’t share it with you.
mask of choice I used Vix’s mask 365
Plugins Needed Optional:
PhotoEffex – Scanlines
Xero – Radiance
Xero- Porcelain
-----------------------
I am using the artwork of Keith Garvey
You can buy his tubes here PTE
-----------------------
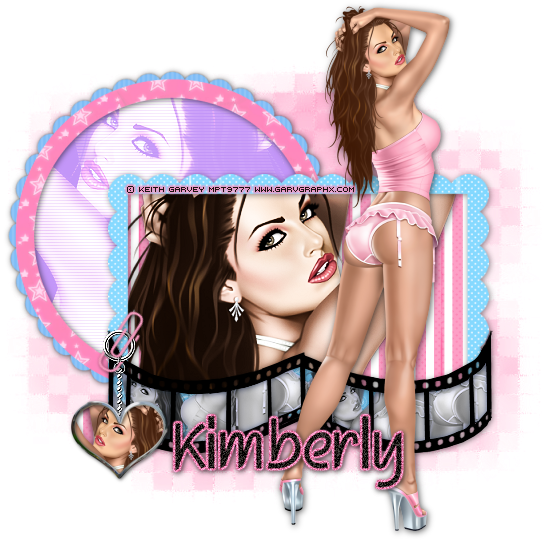
Okay let’s open up the square & circle frame, papers of choice, elements of choice
Now open a 600x600 canvas, place your blue rectangle frame in the middle, use your magic wand select the inside, selections modify>expand by 3 copy and paste your paper of choice now select invert>delete, select none. Now drag your paper layer below your frame, add your tube close up of choice inside thr frame duplicate tube turn the top layer to black and white and change the blend mode to “hard light” merge both tube layers only, add a drop shadow to that, now add one to your frame.
Open your circle frame, now place on the side of your frame use my tag as a guide, click the inside with your magic wand how you did your rectangle frame, now you can either copy and paste your paper of choice or use color, I used the purple from one of the papers and added a new raster layer flood filled with purple, select none and drag my purple layer below my circle frame. Now I mirrored my tube so it’s facing the opposite direction, place where you want the tube to go, select your paper or color layer, selections all, float>defloat go to your tube layer now selections invert>delete now select none, still make sure your tube layer is below the frame, add your plugin scanlines, I then used plugin radidance I felt like I couldn’t see my lines, so I added scanlines again, also add drop shadow on your frame.
Now let’s do this paste your main tube where you’d like it and add a drop shadow to that, Now open your frame of choice and place near the bottom, select inside each square and paste in your paper of choice, I used the blue paper. Selections invert>delete select none. Now drag your paper layer below your frame, now click on each square or do each one seperate, and add your tube or tubes of choices to each square please make sure you use each tube from the same artist, now make your tube layers black and white once you’ve done that add your plugin xero- porcelain if you’d like.
Now you may add any elements of choice, I added the heart from her kit and the paper clip, I messed around with the heart made it look like a charm, you may add your own charm if you’d like or mess around with he heart charm, now for the last part make sure you drop shadowed everything you needed, merge all your layers add your mask.
add your copyright & your name, Now save as a PNG and you're done!

Now lets see those results,
I hope you have enjoyed this tutorial!
-----------------------
This tutorial was written on April 11th, 2010 by Melissa.
In no way may this tutorial be copied to another
website without the creators permission. Any resemblance
to this tutorial is purely coincidental.

No comments:
Post a Comment