-->
This tutorial was written in PSP 9 and can be used with any other version.
I assume that you have a working knowledge of PSP.
-----------------------
Supplies Needed:
Tube of choice/close up
Hot scrapkit by Kristin
Find her “Lithium” kit Here
Template359 by Missy Here
fonts of choice, mask of choice
I used Becky_Mask022
Plugins Needed Optional:
Xero-radiance
-----------------------
You can buy his tubes Here
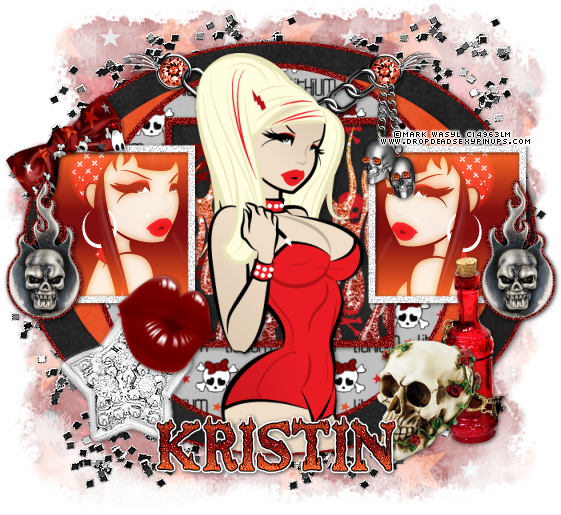
Let’s open your template, resize if needed take off the wordart, image> canvas size, let’s click on the inside of both your squares to the left and right selections all float> defloat> copy and paste paper of choice, or flood fill, I used a gradient orange/red, now selections all float> defloat> copy and paste your tube of choice in each square, invert>delete select none. Now drag your tube layers below your paper/fill change blend mode to screen, add your radiance plugin settings of choice. Now add noise to your outter square frames again or sharpen them, add drop shadows close out of every layer but these squares and your tube and paper layers merge these.
Select your inner square selections all float> defloat> copy and paste paper of choice, invert>delete select none. Now do the same for the outer inner frame add noise then add a drop shadow to the outer frame, open up the “flame” element and place inside that square, close out of every layer beside the layers we were just working with, merge the inner square, now keep the merged layers closed, now select each circle each time selections all float> defloat copy and pasting your papers of choice to each circle invert>delete select none, closing out all layers and merged these to hide them while you work on the next circle etc etc, Now on the first circle on the outer “glittered” circle I used my paper of choice then I re added the noise to that layer, once you’ve added your papers to all of the 3 circles, add your main tube in front in the middle of the left and right squares resize if needed, add drop shadow.
Now time for the easy part, lets bring out all of the awesome elements, I used lips, diamond star, skull charm with flames, red ribbon, skull chain, skull with roses, red bottle, and silver glitters, now resize these if needed place where you want then now add a drop shadow. Now the chain with the skulls the diamonds in the eyes and the circles isn’t included in the scrapkit I added those myself, so use a diamond of choice recolor and resize and place inside the areas to look like mine. Now add your mask, your copyrights, add your name save as a PNG and you’re done
Thanks for trying my tutorial.
Now lets see those results,
I hope you have enjoyed this tutorial!
-----------------------
This tutorial was written on July 1st, 2010 by Melissa.
In no way may this tutorial be copied to another
website without the creators permission. Any resemblance
to this tutorial is purely coincidental.

No comments:
Post a Comment