This tutorial was written in PSP 9 and can be used with any other version.
I assume that you have a working knowledge of PSP.
-----------------------
Supplies Needed:
Tube of choice/close up
Scrapkit by Pimp'd Designz
Find her ptu “Teacher's Pet” kit Here
fonts of choice, Missy’s Temp287
Get this template at her blog Here
Plugins Needed Optional:
Mura’s - copies
-----------------------
I am using the artwork of Elias Chatzoudis
You can buy his tubes at www.mypsptubes.com
-----------------------
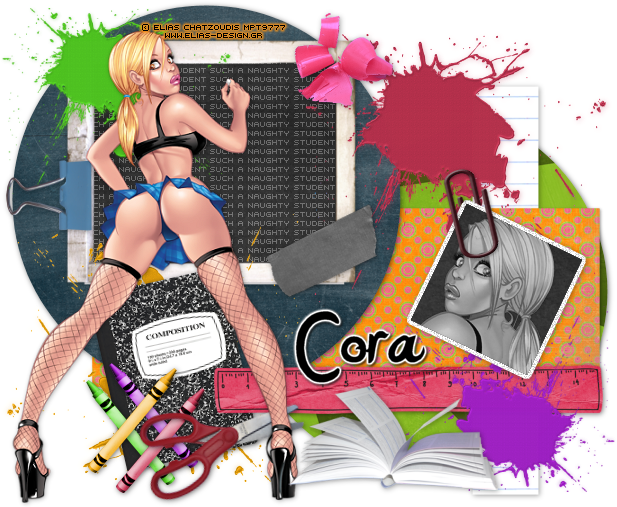
Let’s open the template, I got rid of her wordart and copyrights, the frames and small circles. Select the big pink circle on the left selections all float> defloat copy and paste paper of choice, invert>delete select none. Select the rectangle selections all float> defloat copy and paste paper of choice, invert>delete select none. Now do the same for the black circle and the longer rectangle. Now open up your scrap pieces I used the chalk board, crayons, clip, paint splats, ruler, notebook, open book, tape, crayon shavings, paper clip, scicors, now resize these place them around your tag where you want them now add drop shadow, I colorised all my paint splats and crayons.
Now place your chalk board where the frame was grab your text tool and type out “such a naughty student” go to your plugin mura’s copies, now click on your chalk board, use your magic wand click the inside where the black is now with the marching ants around the square, click back on your text layer selections invert>delete. Drag this later below everything but not your chalk board, lower the opacity.
I then used my preset tool set to square, make a square and use your deform tool and move it slightly to the side, selections all float> defloat> modify> expand by 3 add a new raster layer flood fill color of choice, selections none, drag this layer below your preset square add noise, then a drop shadow get your paper clip and place on the side made it look real by deleting some of the paper clip add a drop shadow before you crop it. now click on your preset square selections all float> defloat> copy and paste your tube of choice, invert>delete select none.
Now turn your tube black and white, add drop shadows to your squares now merge these, now resize your main tube down some place on your tag in front of your chalk board so it kinda looks like she wrote the words, add drop shadow now add your name copyrights and you’re done!
Thanks for trying my tutorial.
Now lets see those results,
I hope you have enjoyed this tutorial!
-----------------------
This tutorial was written on September 30th, 2010 by Melissa.
In no way may this tutorial be copied to another
website without the creators permission. Any resemblance
to this tutorial is purely coincidental.

No comments:
Post a Comment