
This tutorial was written in PSP 9 and can be used with any other version.
I assume that you have a working knowledge of PSP.
-----------------------
Supplies Needed:
Tube of choice/close up
Great PTU scrapkit by Chassity
Find her “Under The Sea” kit Here
fonts of choice, sand of choice
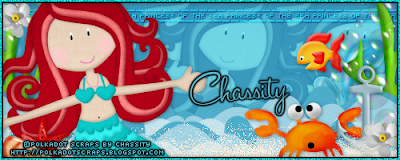
Let’s open a 500x200 canvas, open up all your scrap pieces and your tubes.. I used the pretty little mermaid that came with her scrapkit, you can use any mermaid tube or any tube, now if you don’t have her scrapkit just follow along with different pieces. I opened what looks to be water waves so I resized them down, copied and pasted them on the canvas made sure they went all the way across, I then merged them added a drop shadow and opened up the tube resized it and placed on the left side.. I also added a drop shadow, now add a new reaster layer drag it to the very bottom flood fill color of choice, I choose a light blue. Now click on your tube and duplicate, then go to image>mirror this will flip the tube around, drag below your water layer and duplicate these tubes to make it look like a background, hide all layers besides your mermaid tubes in the background, merge and unhide everything on that layer change blend mode.
Now all you really need to do is open up all the pieces you want to decorate with, I used sea weed, white flower with yellow bead in the middle, bubbles, squirt of water, sea shell, crab, fish, achor, star fish and that’s it, the sand didn’t come with the scrapkit so use your own sand, resize all the scrap pieces down small so you can place them around on your forum set, then place your sand on the bottom so it looks like sand and sea… now I got my preset tool set at rectangle, but then I changed my style line, add new raster layer made a small rectangle across the forum set then messed with the blend modes, then added “Princess Of The Sea” in a pixel font that I also changed the blend mode too.. And once you’ve done all that you’re almost done, now add your name and your copyrights, now you're done!
Thanks for trying my tutorial.
Now lets see those results,
I hope you have enjoyed this tutorial!
-----------------------
This tutorial was written on September 30th, 2010 by Melissa.
In no way may this tutorial be copied to another
website without the creators permission. Any resemblance
to this tutorial is purely coincidental.

No comments:
Post a Comment