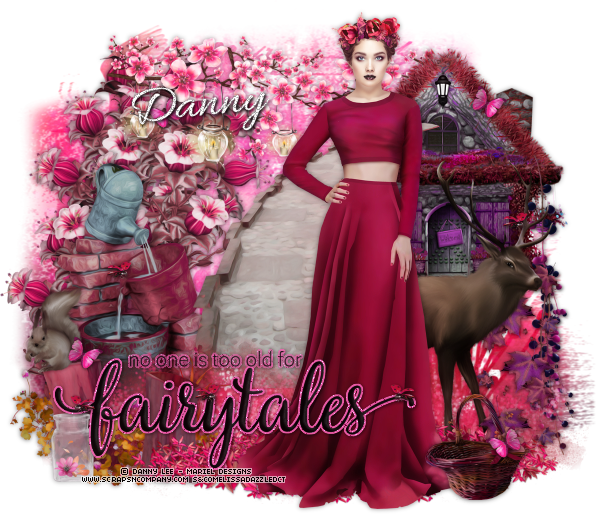
This tutorial was written in PSP 9 and can be used with any other version. I assume that you have a working knowledge of PSP.
-----------------------
Supplies Needed:
Tube of choice/close up
Paid Scrap kit by Mariel Designs
"Fairy Flower" Purchase at Scrap N Company
Font of choice
Allura
Plugins Optional:
Redpaw media - beautifier
Tutorial shortcut index:
"Delete" on your keyboard under Insert.
"C/P" copy and paste as new layer.
Remove "O/L" Remove original layer.
"D/S" Drop shadow located in 3D effects.
"R/S" Resize layer located in Image.
New "R/L" Raster layer, in Layers.
"outer glow" Gradient glow from eye candy
Or my method on my blog under "How to dos"
Good D/S settings:
0, 0, 57, 6, color black
Good add noise settings:
Uniform- 70-90 % noise monochrome
Random- 10-34% noise monochrome
-----------------------
I used the artwork of Danny Lee
You can find his artwork HERE
Tube i used can be found HERE
-----------------------
Canvas size 620x620, Open element 1 C/P onto canvas
Erase the bits hanging to the left side
Open tube R/S to 50% C/P onto canvas, place at right D/S
Open element10, R/S to 50% C/P onto canvas, place in the center
Mirror this so it's curved to the right hand side, D/S
Open element45, R/S to 50% C/P onto canvas off to the left side
drag below your tube layer, just enough so half is showing
Open element9, R/S to 40%, C/P onto canvas
Place this behind your tube but on top of the last element you placed
Open element30, R/S to 60%, C/P onto canvas
Drag below tube layer, but above your path layer
duplicate and mirror place this near the bottom of canvas
Open element40, R/S to 40%, C/P onto canvas
I started building up this flower on the left hand hide
Behind the water wall scene. duplicating as needed
Open element4, R/S to 40% C/P onto canvas
drag below your tube layer, place in the background near top
Open element100, R/S to 50%, C/P onto canvas
Place on the right hand side, behind tube layer
Using deform tool i smooshed it down alittle bit more
Sharpen and apply drop shadow
Open wordart element 48, R/S to 60% C/P onto canvas
Place off to the left hand side, applying your own filters to wordart
Open element59, R/S to 50% C/P onto canvas - mirror
Place near the right side of your tube below. and on top of the house layer
Now it's time for more elements
Elements i used and the resized %
Using this drop shadow: 0, 0, 48, 7, color black
ELEMENT11 - 20%
ELEMENT56 - 60%
ELEMENT93 - 15%
ELEMENT60 - 15%
ELEMENT13 - 15%
ELEMENT12 - 50%
ELEMENT31 - 25%
ELEMENT92 - 50%
place elements where you want, or use my tag as a guide.
Apply your mask, copyrights, add your name save as a PNG
I applied beautifier to the whole tag, settings of choice
You're done!
Thanks for trying my tutorial.
----------------------
This tutorial was written on August 3rd, 2016 by Melissa.
In no way may this tutorial be copied to another
website without the creators permission. Any resemblance
to this tutorial is purely coincidental.


No comments:
Post a Comment